You're Being Blocked as a Spam-Mail Sender as Too Many Mails are Bouncing Back...Use MailChimp
You need to send out multiple emails but sometimes they come back returned to sender and so you are branded by your ISP as a spam-mail sender and blacklisted/blocked? Never fear, MailChimp is here to help you.
MailChimp's Forever Free Plan gives you access to most MailChimp features, but limits your total subscribers, as well as your daily and weekly sends. Keep up to 2,000 subscribers across all lists in your account and send up to 12,000 emails per month. In any 24-hour period, you can send up to 2,000 emails through their platform.
When you sign up with MailChimp you are automatically signed up to their Forever Free Plan. You do have the option to purchase upgrades, but you do not need to as this free plan has everything your heart could possibly desire in sending bulk emails to a list of subscribers.
Step 1:
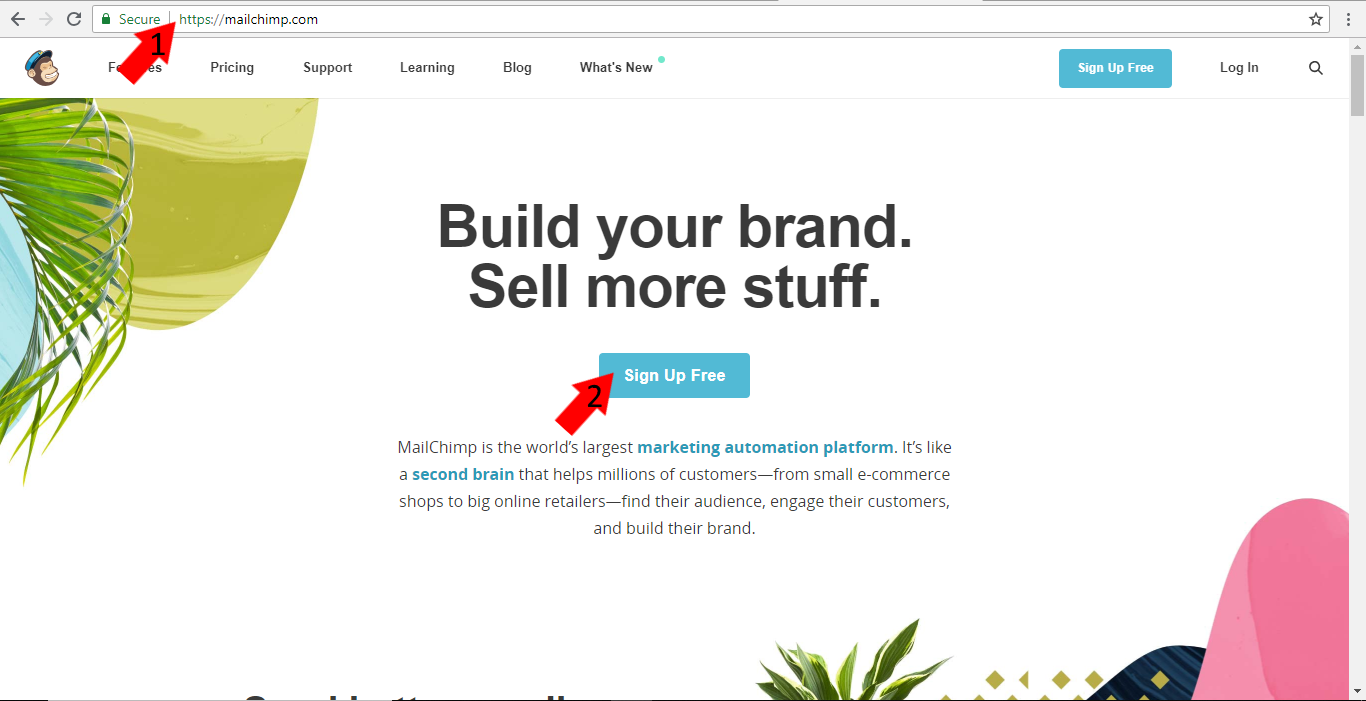
Go to www.mailchimp.com (1) and click on ‘sign up free’ (2)
Step 2:
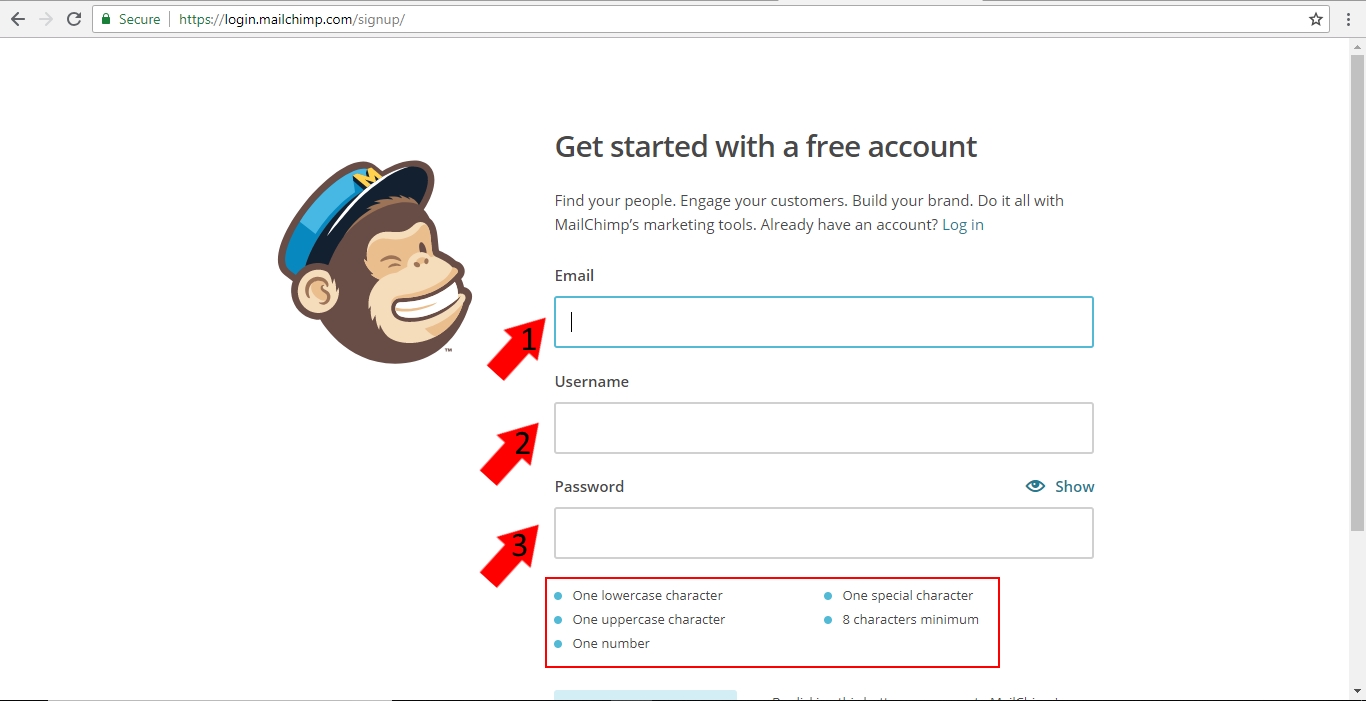
Fill in your email (1) your username (2) – which either has to be numbers or can be your email address – and your password (3) [making sure you fulfil all the password requirements]
Step 3:
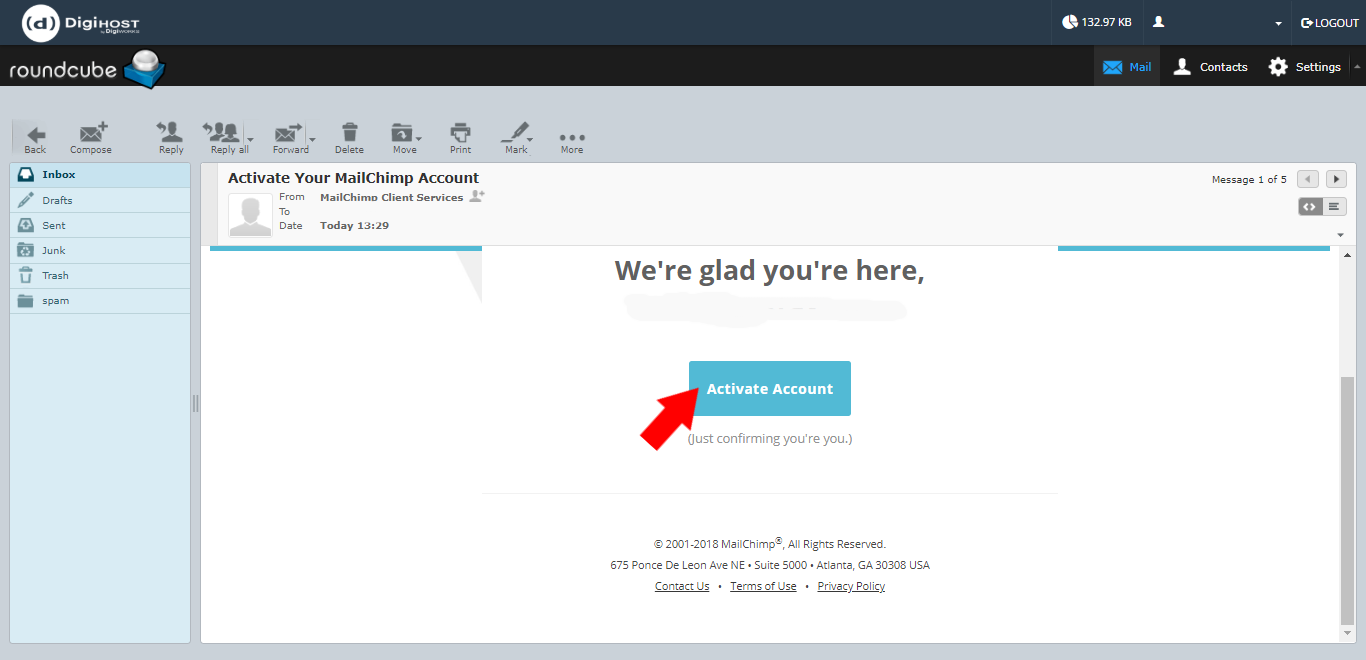
You will then receive an activation email to the email you put in for 1 in step 2 above. Click on the ‘activate account’ button to activate your email address.
Step 4:
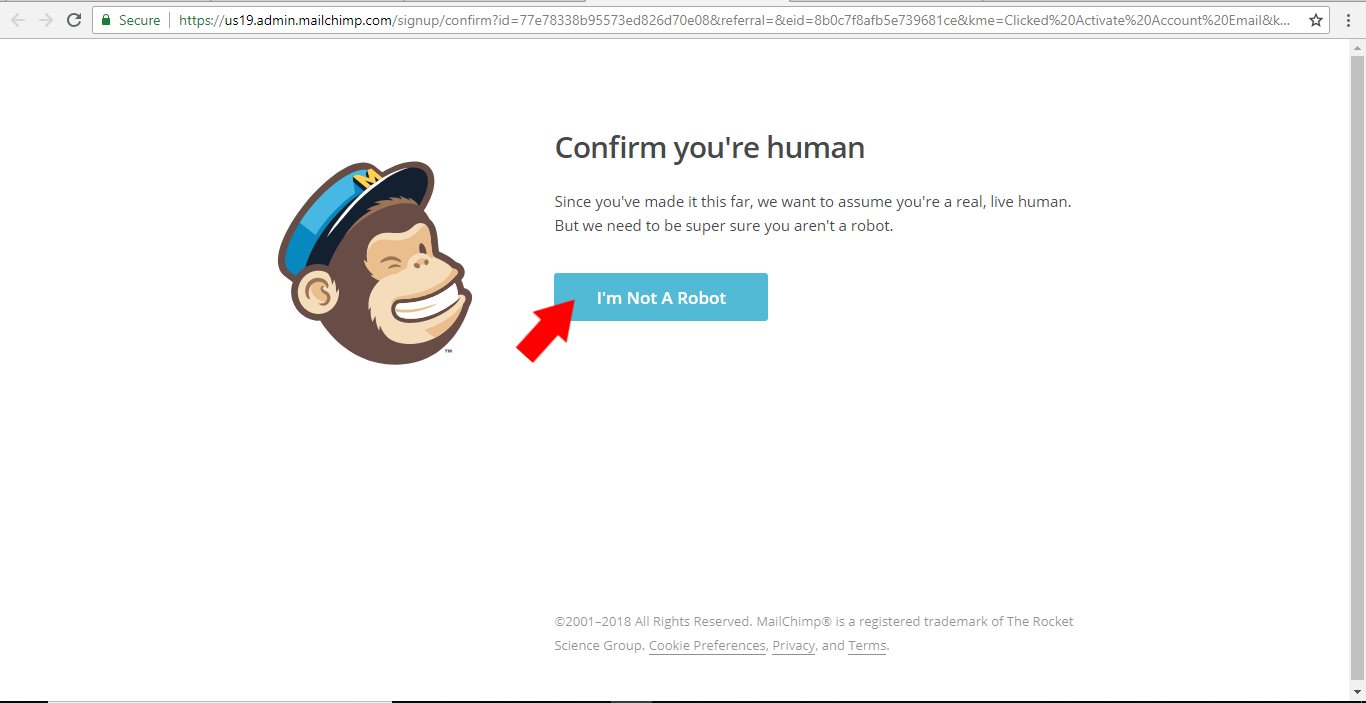
Click on ‘I’m not a robot’ to confirm that you are indeed a human creating this account and not a bot.
Step 5:
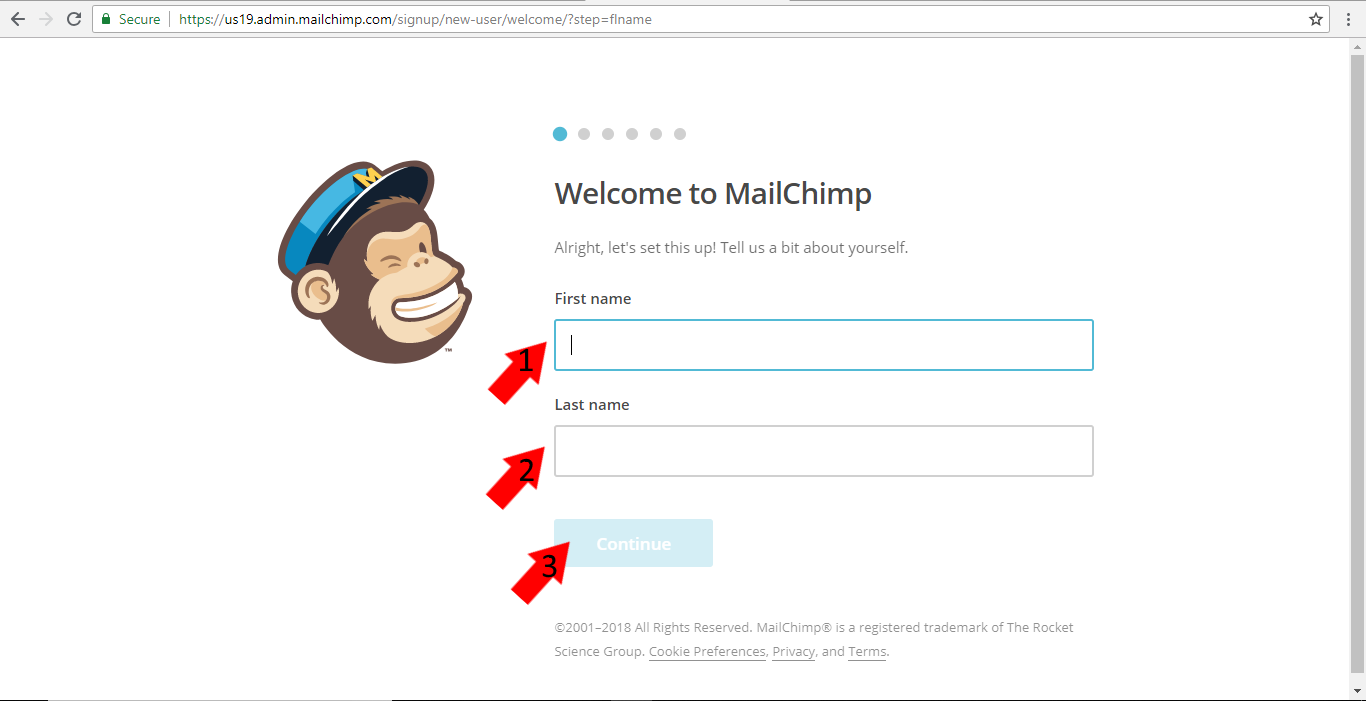
Fill in your first name (1) your last name (2) and once you have done this continue will become available to click (3).
Step 6:
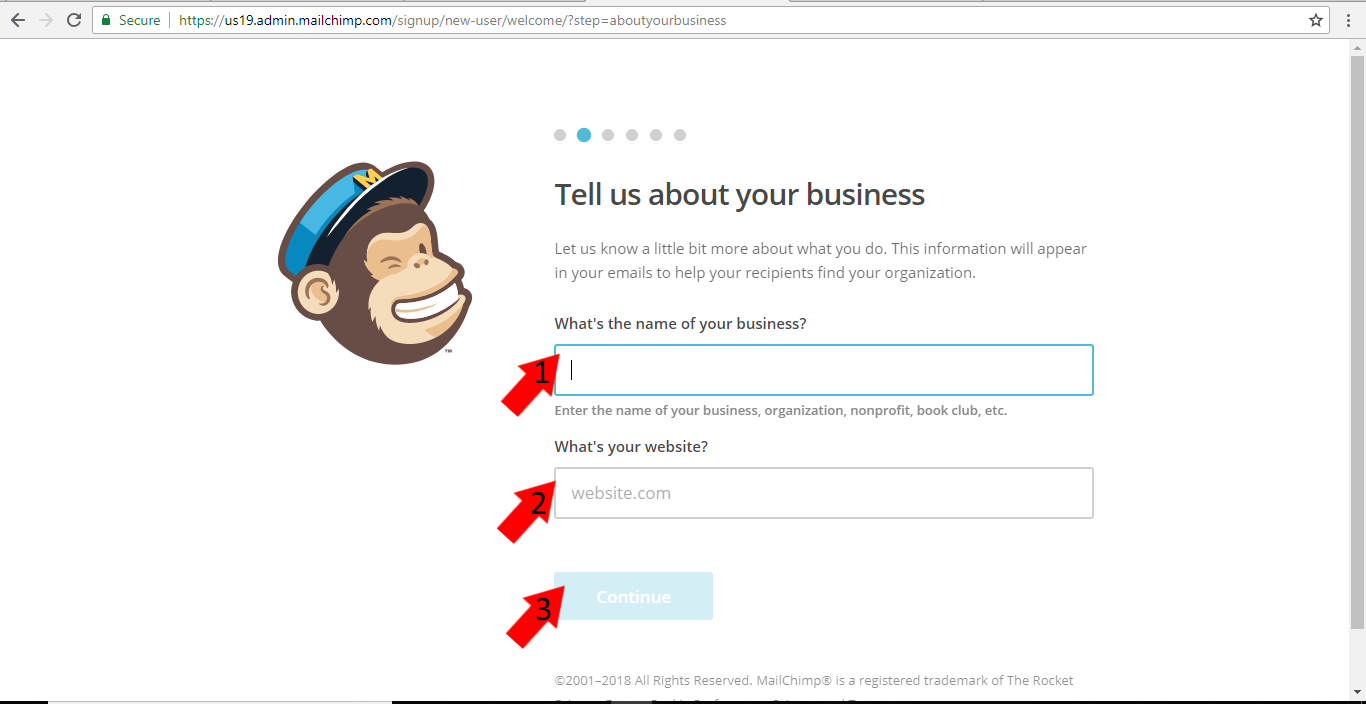
Repeat this with the name of your business (1), your website (2) and then click continue (3).
Step 7:
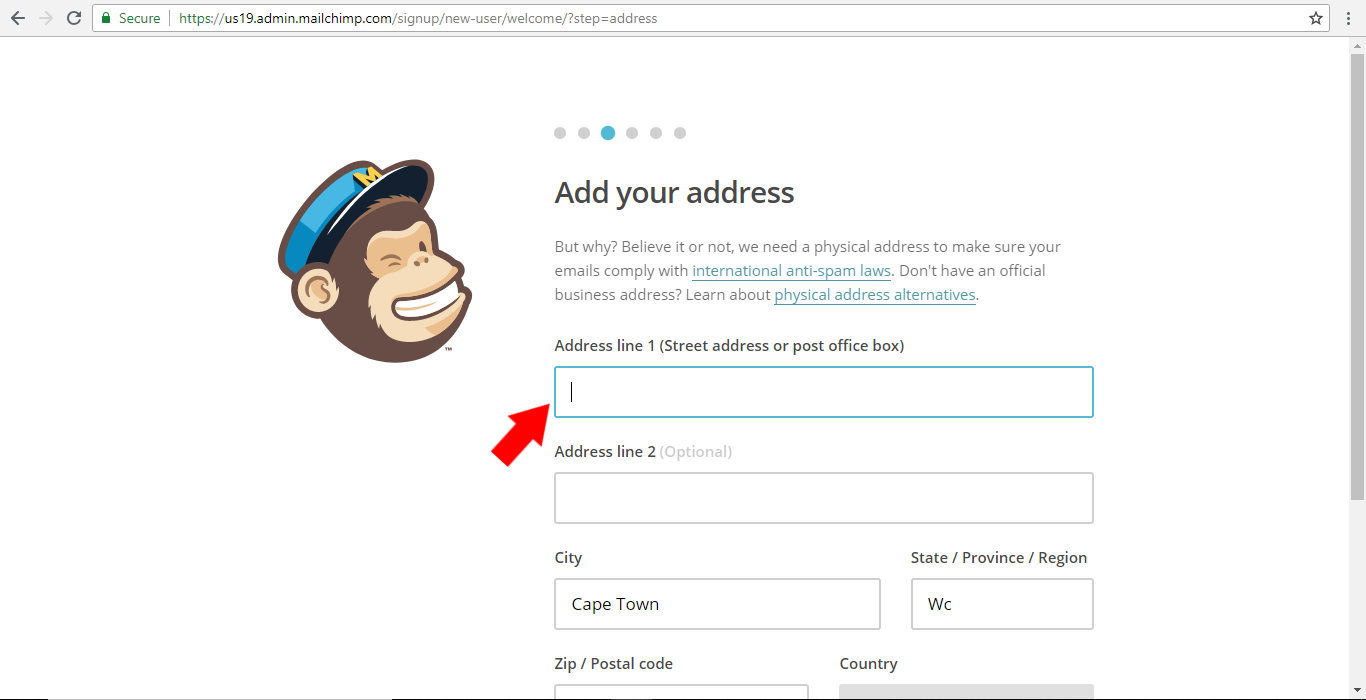
Fill out your address and click continue.
Step 8:
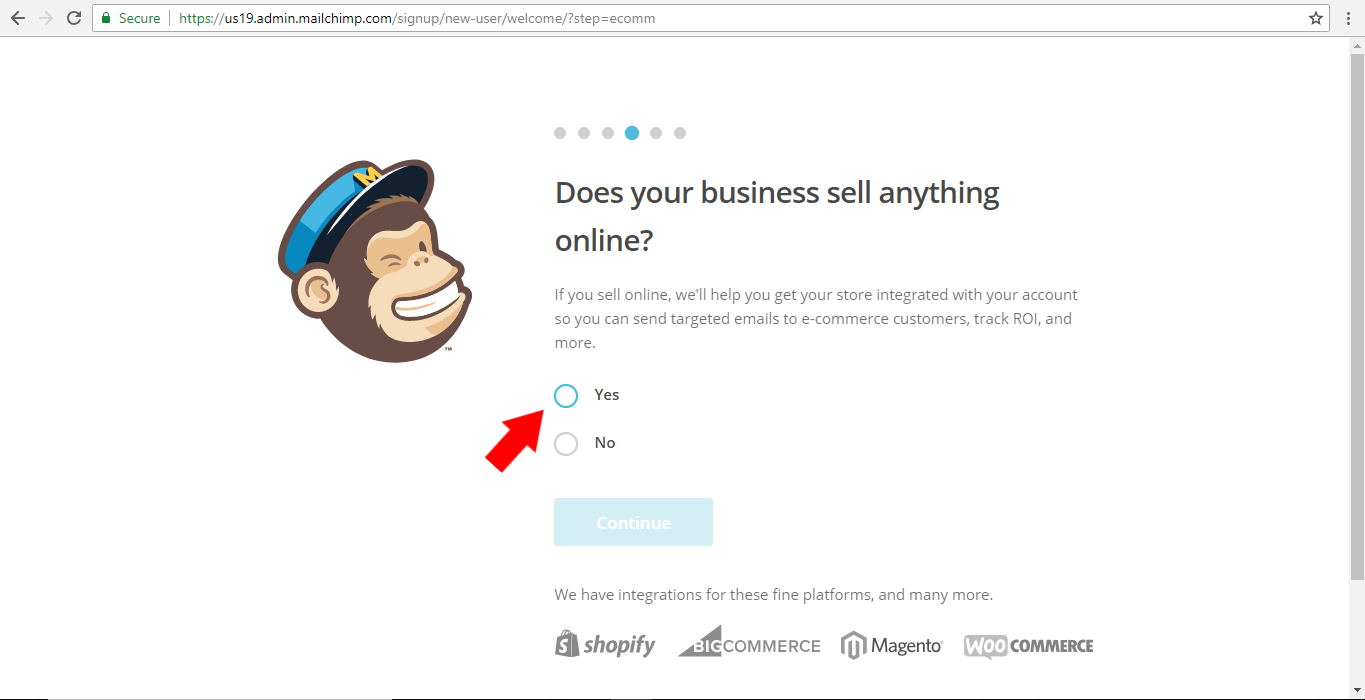
Click ‘yes’ or ‘no’ depending on if your business sells anything online and then click continue.
Step 9:
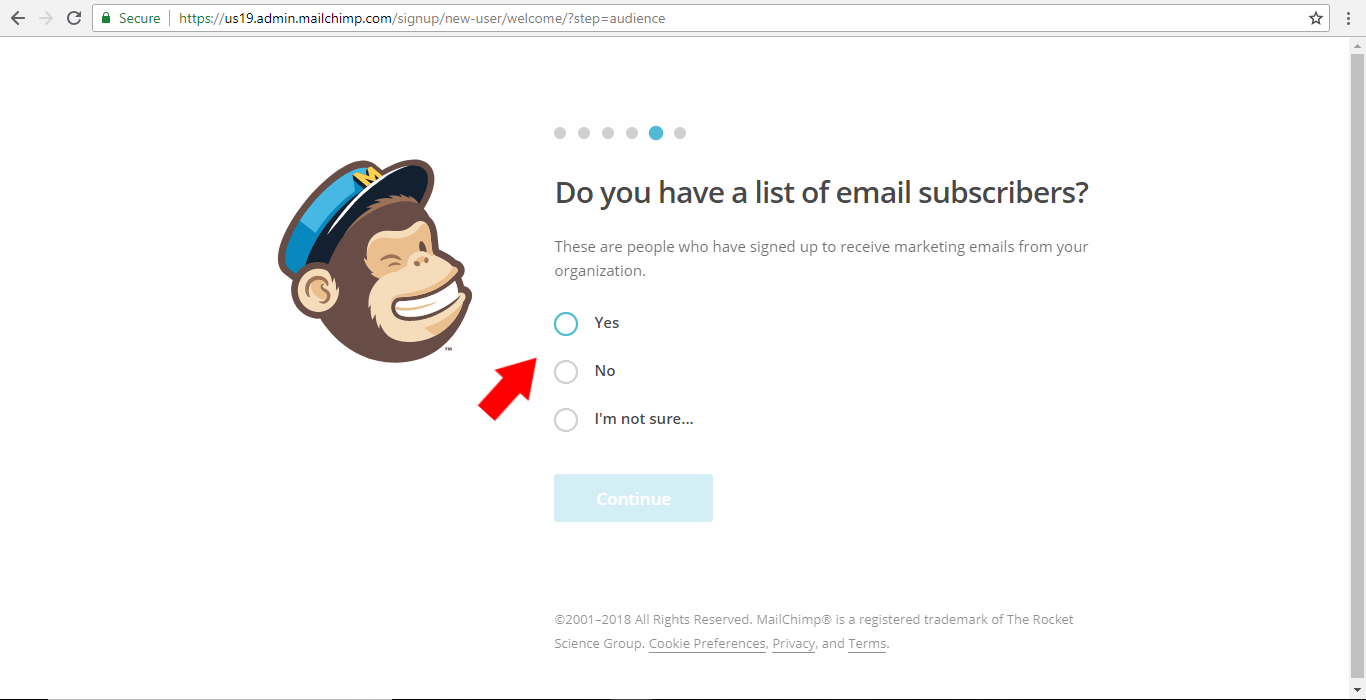
Click ‘yes’, ‘no’ or ‘I’m not sure’ as to whether you have a list of email subscribers and then click continue.
Step 10:
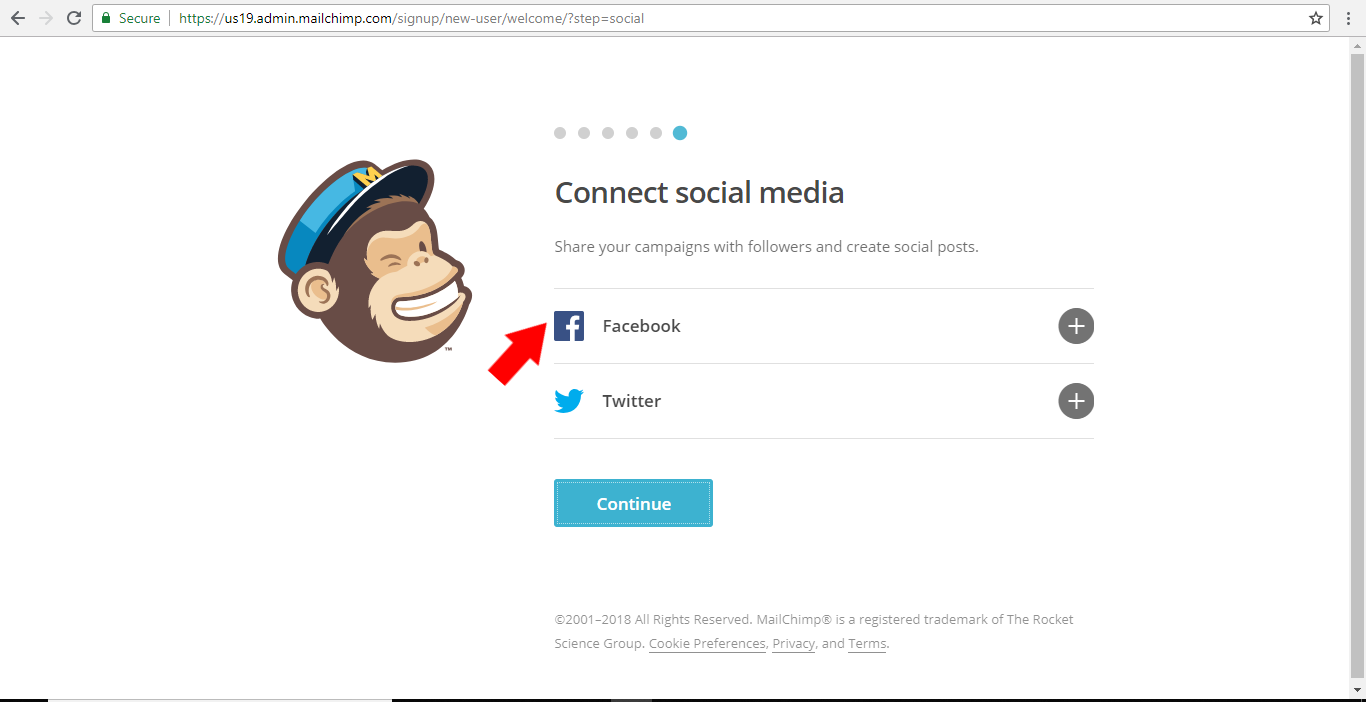
Connect to Facebook and Twitter if you want to, or else just click continue.
Step 11:
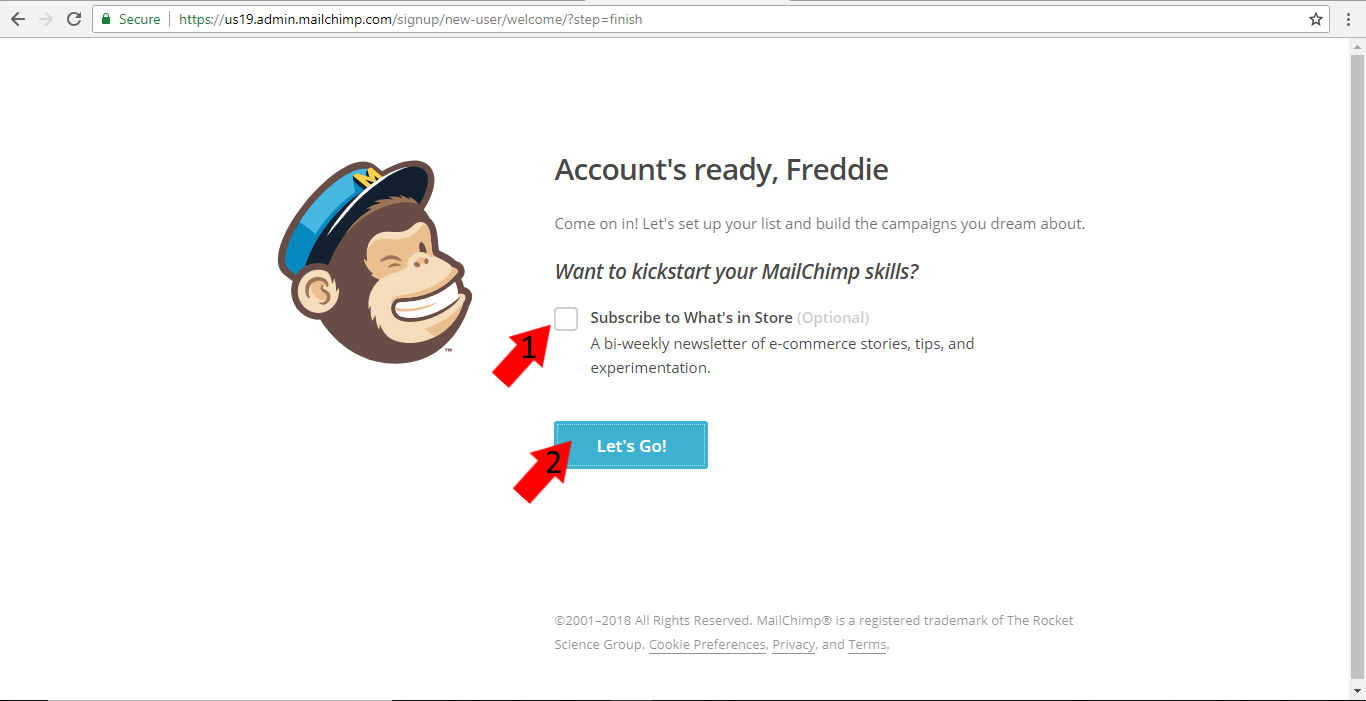
Optional subscription to the MailChimp newsletter (1) or click ‘let’s go’ (2) to go to your dashboard.
Step 12:
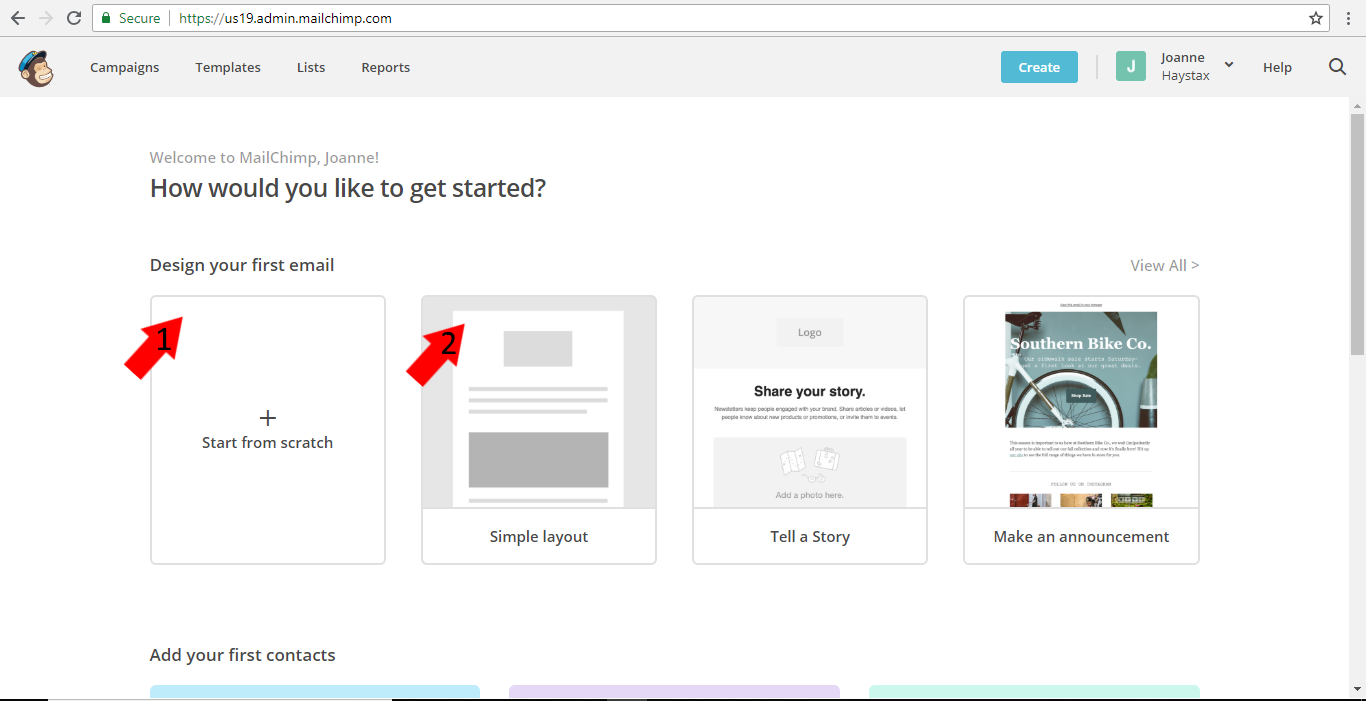
You are now ready to begin emailing your subscribers (1), importing your mail lists and they even have templates for you to work from (2).
